Offer valid for
Complete print files, every step on video, styled your way
3D Print a Real Mechanical Clock That Actually Ticks
84 printed parts and a handful of bearings and screws. No battery, no motor: wind the weight up and gravity does the rest.
There is a reason people stop in front of a mechanical clock with its gears out in the open.
Nothing is hidden. A weight drops a few millimeters. A gear train turns that drop into one slow lap of the minute hand per hour. An anchor rocks with the pendulum and lets the escape wheel slip past one tooth at a time.
You can watch every part of it work. And all but a handful of those parts came off a print bed.
One mechanism. Any look you want.
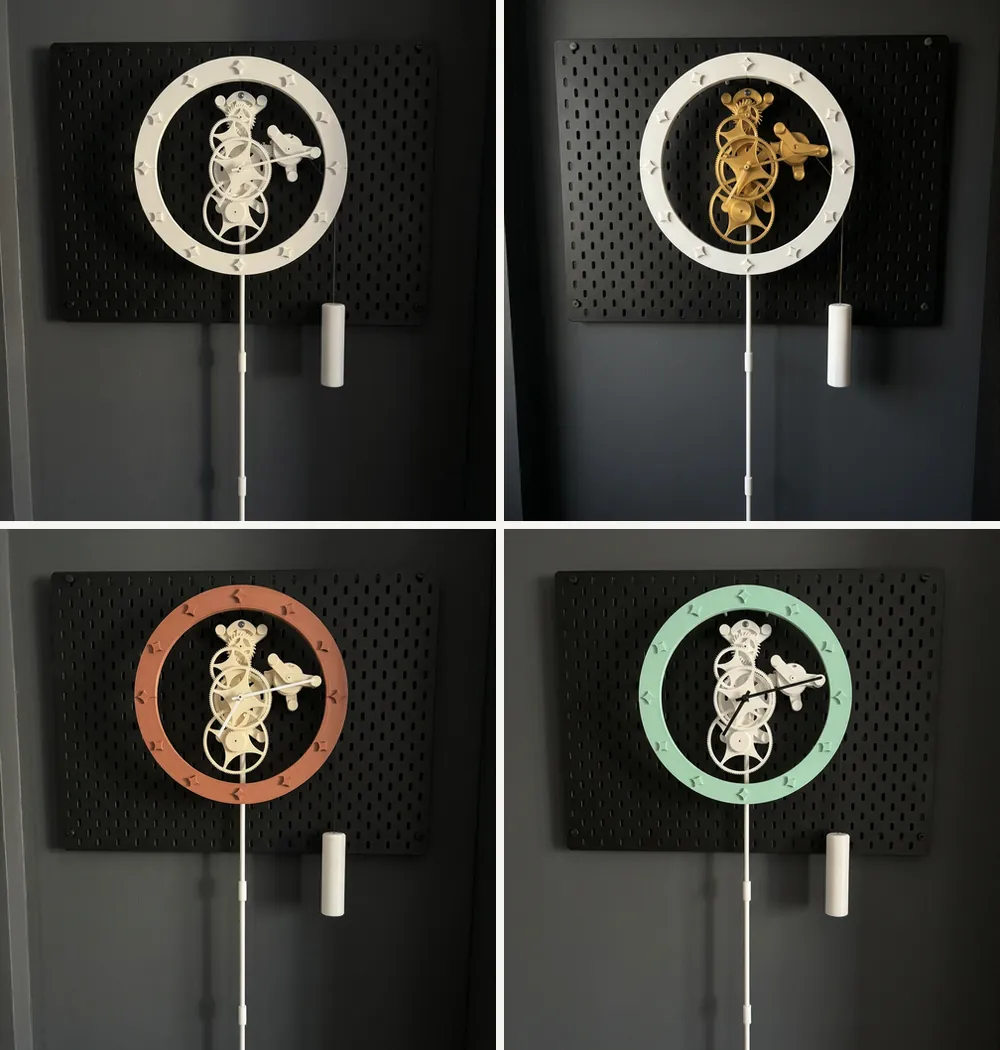
The course clock is matte white. Yours can be gold gears on a black board, a terracotta ring, or whatever filament is sitting on your shelf. The colors change, the mechanism stays exactly the same.
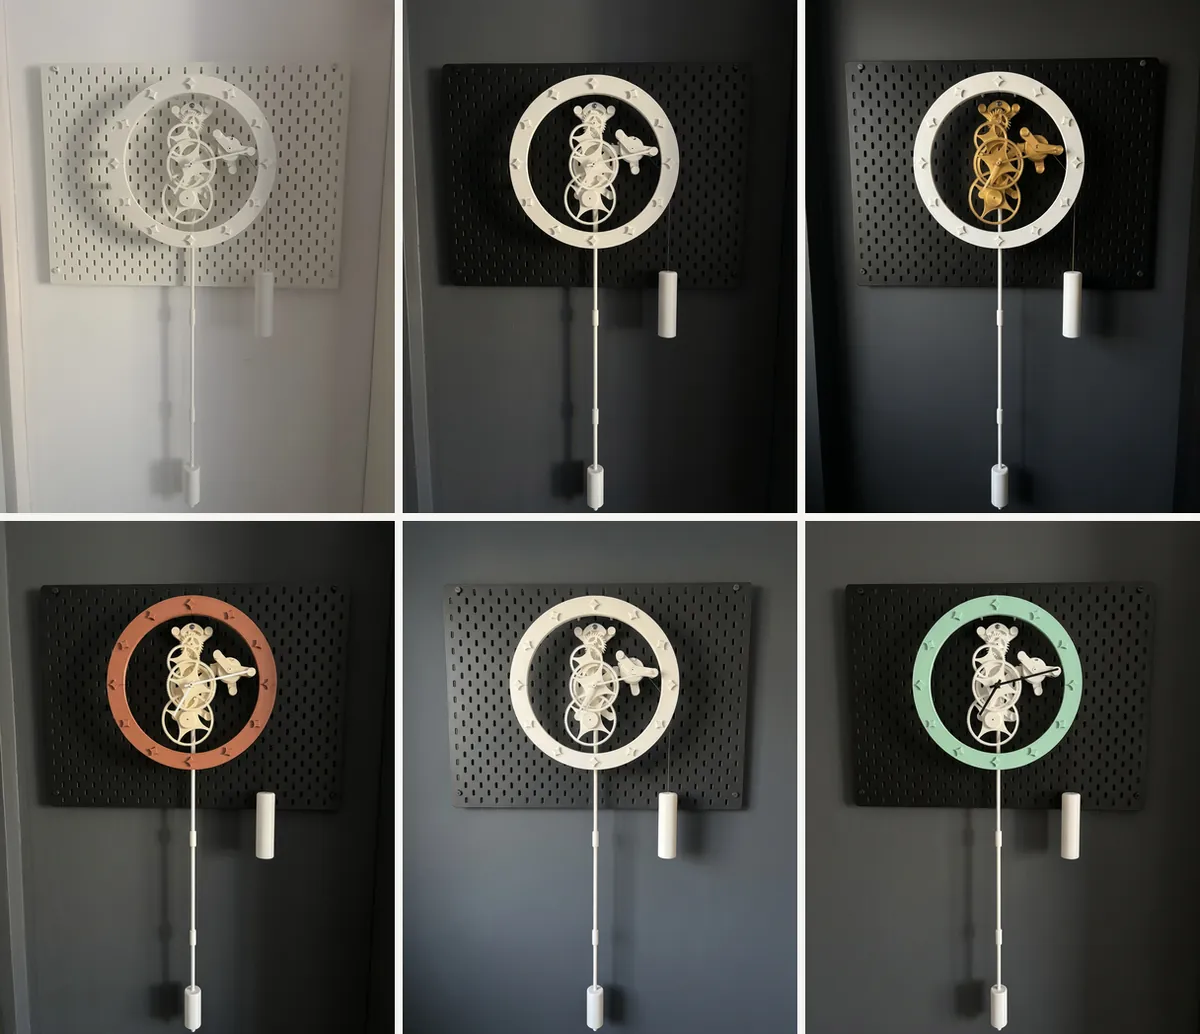
Top left: the real course clock. The rest are colorway ideas for your build.
Imagine...
Imagine the sixth plate finishing on a Sunday morning. About 24 hours of print time behind you, 84 parts cooling on the desk. Gears with clean involute teeth, frame arms, ring segments, a pendulum rod. You press the first bearing into its seat and it goes in with exactly the right resistance, because that fit was tuned on real printed parts long before you downloaded the file.
Imagine hanging the weight for the first time. You give the pendulum a nudge. The anchor catches, releases, catches. Tick. Tick. Two seconds per swing, thirty teeth per turn, so the escape wheel makes exactly one revolution a minute, and the minute hand starts to creep.
Imagine a friend asking where the battery is. You point at the weight tube hanging under the dial. On the wall, a clock that keeps time with nothing but a weight and a pendulum, made of parts you printed yourself. The next question is always the same: how long did that take you? And the honest answer is a day of printing and an assembly you actually enjoyed.
Be honest about what has come off your printer in the last year.
"Another benchy. Another cable clip. Another thing that just sits there."
So you went looking for a real project. Something with moving parts. Something that does a job. A mechanical clock is the obvious one: every maker wants to have built one, and plenty of free models are one search away.
So you downloaded one. Maybe three. A day of printing, and then a gear train that binds the moment you hang any weight on it. Or it runs for a minute and stops. Or it runs, and drifts so badly it is a sculpture with hands. And there is nothing in the readme about why.
The files often come with very little explanation. You rarely get the tolerances, the print orientation, which parts want to be metal, the order of assembly, or a way to test one stage before you bury it under the next.
So you tinker. You sand a tooth here, shim a shaft there, add weight until the cord snaps. At some point the half built frame goes on the shelf next to the other half built frames, and the thought arrives:
"Maybe printed clocks never really run. Or maybe you need an engineering degree to make one run."
But what if...
What if your printer was never the problem? And what if more fiddling was never the answer either? Here is what actually happened. You were handed geometry with no engineering attached. A clock is a chain of fits, clearances and ratios, and if one bearing seat is a tenth too tight, the whole train pays for it. The free model never told you that.
It comes down to four decisions, and this clock has already made every one of them, with the reasoning included:
1. The design was debugged on real printed parts
Bearing fits were adjusted after the first parts came off the bed. Gear positions were refined. Friction was hunted down stage by stage. The drive section was reinforced after it proved too weak under load. Several versions later, you get the one that runs. You also get the story of the ones that did not, which is worth more than the STL.
2. Metal where metal belongs, plastic everywhere else
84 parts are printed. The rest is a short list: small ball bearings, M4 screws, washers, one metal shaft, a length of cord, and 800 g of lead inserts for the weight. Where a printed bushing would wear and drag, a bearing goes in. Trying to print absolutely everything is how a lot of printed clocks end up as wall art.
3. Every stage is tested before the next one goes on
The assembly follows one rule: do not continue until the previous stage spins freely. A gear train multiplies friction the same way it multiplies torque, so a little drag in four places becomes a clock that will not start. Build in order, test as you go, and the first start is a formality instead of a mystery.
4. You set the time with one slide of the pendulum bob
A pendulum period of about two seconds, an escape wheel of 30 teeth, a gear train of 720:1, and the hands turn at the right speed. If the clock gains, slide the bob down. If it loses, slide it up. Check it against the stopwatch on your phone. That is the entire calibration procedure.
All you need is a 3D printer with a 256 mm build volume, about 760 g of filament, an IKEA SKÅDIS pegboard and about $25 to $35 of hardware. And I'll walk you through every part of it on video.
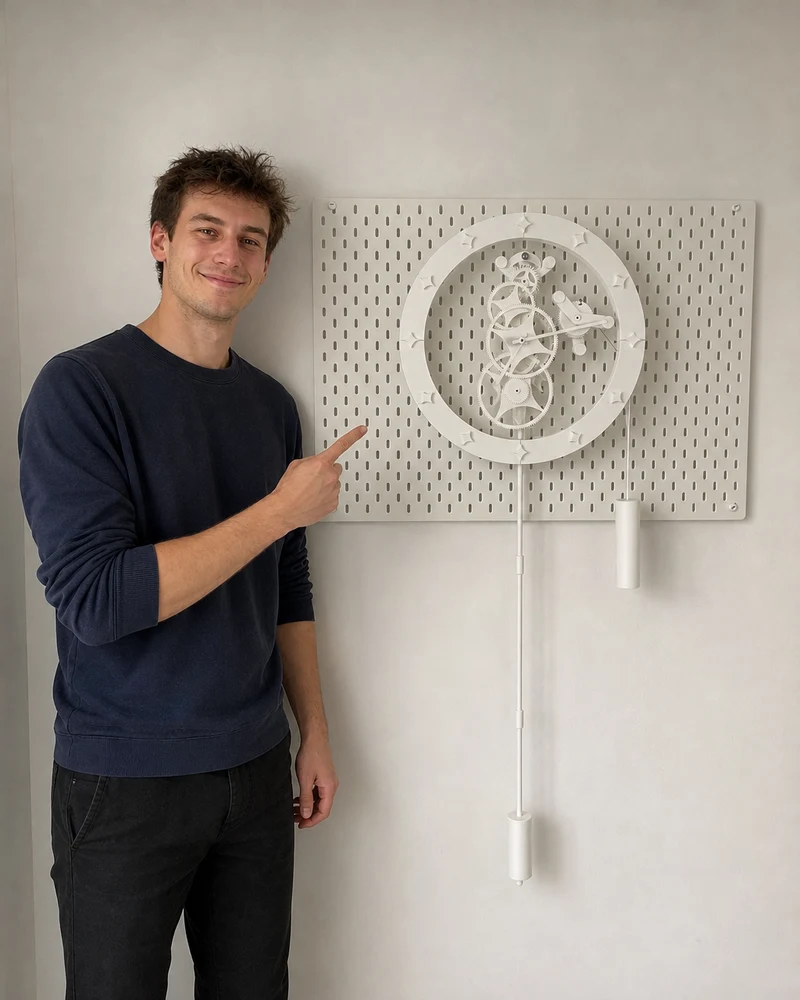
A hello from the engineer who built it
Hi, I'm Jimmy! I'm a mechanical engineer, and this clock was my master's thesis. It started as a thesis project and ended up as a clock on my wall.
It did not run on the first try. The bearing fits needed adjusting, the gear positions needed refining, and the train had more friction in it than the weight could overcome. I adjusted the fits. I moved the axes. I chased friction through the train one stage at a time, and when the drive section proved too weak I reinforced it and printed it again. Several versions later, it ran.
Along the way I learned what actually makes a printed clock run. The geometry is the easy part to share, and the engineering rarely comes with it. The fits, the clearances and the order of assembly are what make the geometry work, and they are the part that seldom gets uploaded with an STL.
So this course is that missing part. Every file, every fit, every stage of the assembly, and every mistake I made so you can skip it. If you can run a printer and turn a hex key, you can build this. You do not need my degree. You need the right files and someone to tell you which stage to test before you move on.
That's why I made this course.
For the first time ever
Introducing: The Gravity Clock
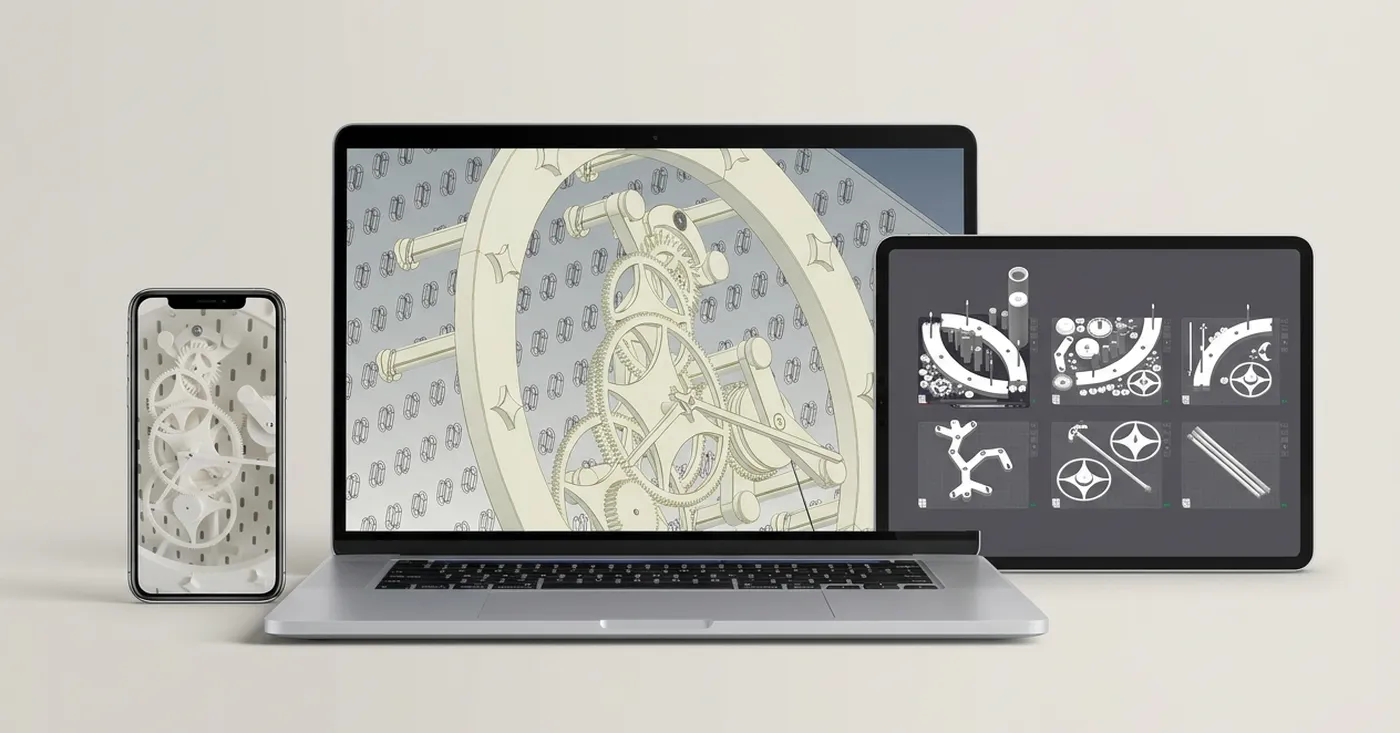
- Complete print files: STL, STEP, and a ready Bambu Studio project with all 6 plates laid out
- Step by step video build, every stage shown on camera
- A pass or fail test at every assembly stage, so you catch friction before it gets buried under more parts
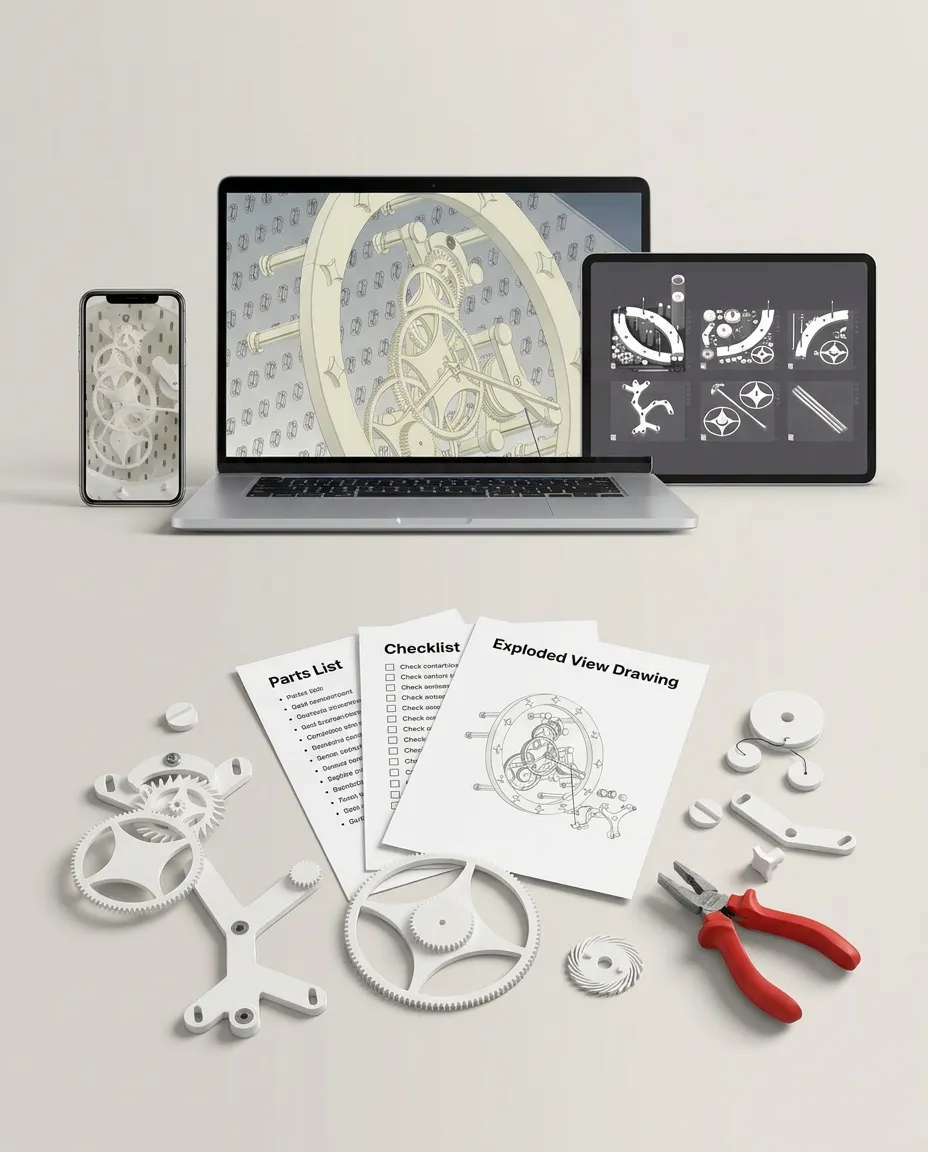
- Access on mobile, tablet, and computer
- At your own pace, pause and rewind as often as you like
- Lifetime access
⚙️ What's Inside ⚙️
Module 1
How Your Clock Works
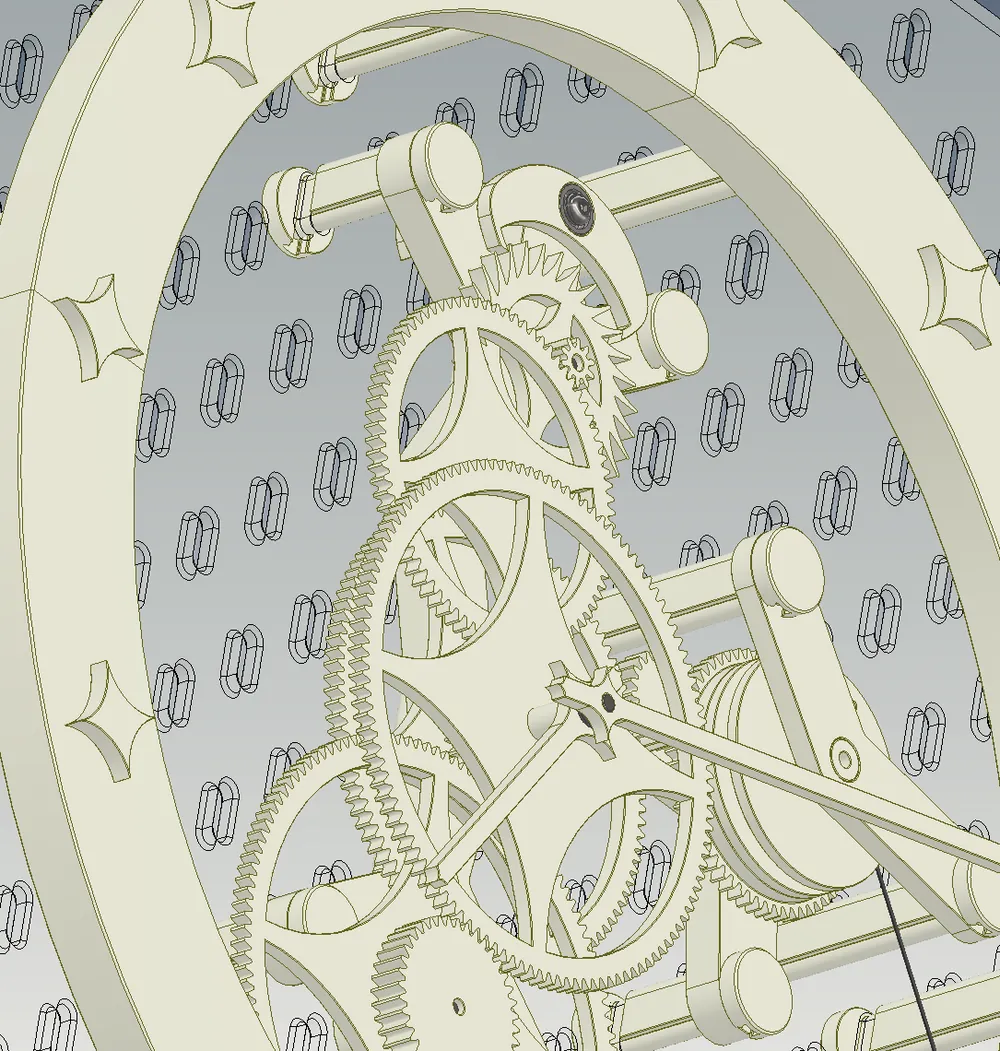
Weight, gear train, escapement, pendulum. Follow the energy from the falling weight to the hour hand, and understand why the thing keeps time before you print a single part.
- •Why a clock can't be just a chain of gears: without an escapement the weight would hit the floor in a second and the hands would spin like a fan
- •The Graham escapement in plain language: escape wheel, anchor, pallets, and how a swinging pendulum lets the wheel advance one tooth per cycle
- •The arithmetic of the hands: a 30 tooth escape wheel, a pendulum period of about two seconds, and four gear stages (8:1, 7.5:1, 4:1, 3:1) that multiply to 720:1 and put the minute and hour hands at the right speeds
- •Why pendulum length sets the time, and how moving the bob changes the period, which is all you'll need for tuning later
Module 2
Filament, Colors and Your Look
The course clock is matte white on a white board. Yours doesn't have to be. Choose your material and your colorway before the printer starts, so you only print the parts once.
- •PLA Matte is what the course clock is printed in, and why: stiff, predictable dimensions, easy to source, and it makes the mechanism the only thing you look at
- •What to think about per part: gears and bearing seats want stiffness and accuracy, the ring, hands and dial can be anything that looks good, including wood fill, silk and two tone filament
- •Colorway concepts to borrow: white parts on a black board, gold gears, a terracotta ring, a mint ring, wood look gears. Cosmetic parts never touch the mechanism, so none of these change how it runs
- •About 760 g of filament for the whole clock, so one 1 kg spool covers it with room for a reprint or two
Module 3
Slicing and Printing All 84 Parts
Six build plates, about 24 hours of print time, 0.4 mm nozzle, 0.2 mm layers. The exact orientation and settings for every part, and the ones you must never let the slicer auto orient.
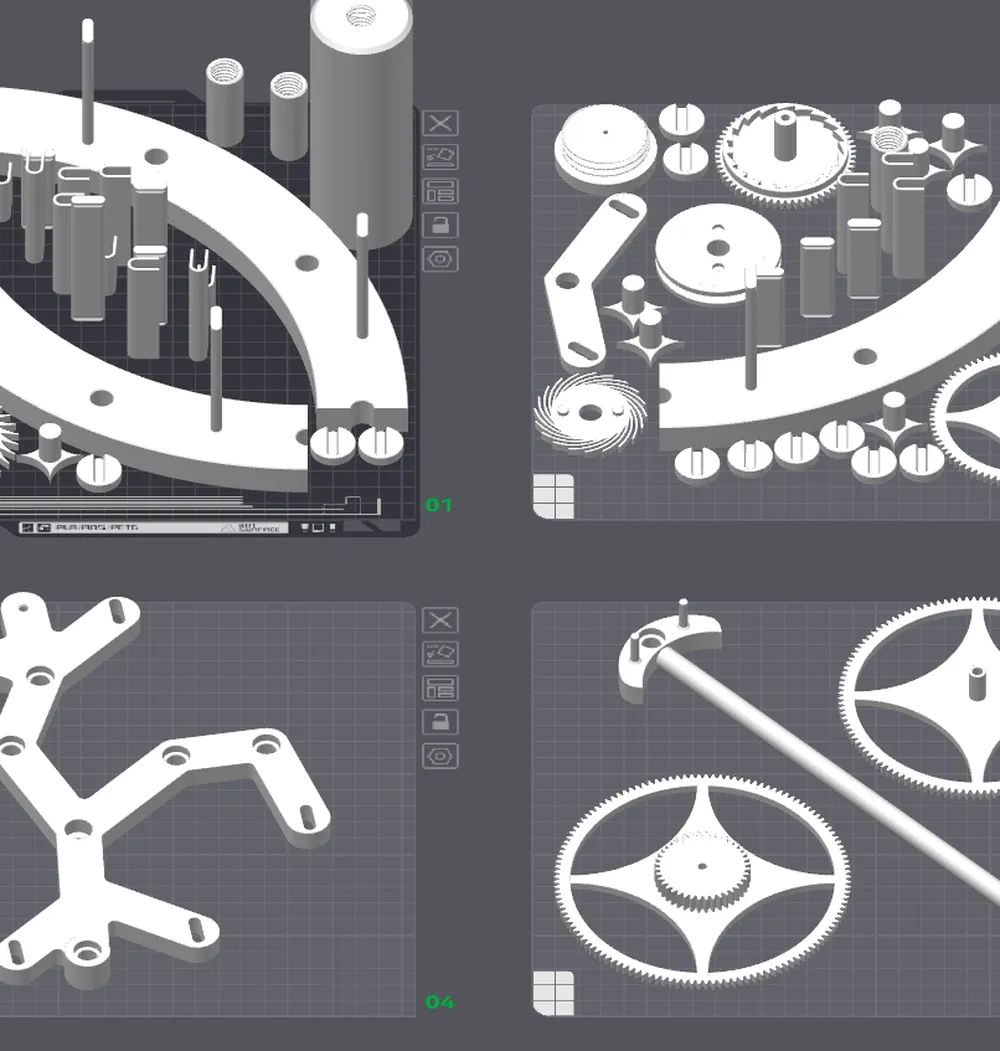
- •Open the ready Bambu Studio project and all 6 plates are already laid out, every part oriented and every setting applied. Other slicers get the STLs and STEPs plus the settings in writing
- •Why gears print flat and why some parts don't: orientation decides tooth quality, hole roundness and strength, and auto orient has no idea which of those matters on a given part
- •Layer height, infill, supports and brim, part by part, with the reasoning, so you can change them for your machine without guessing
- •Not on an X1 Carbon? Fine, as long as your printer has a 256 x 256 x 256 mm build volume. You'll see how to bring the plates into another slicer and what to check on a test print before you commit 24 hours
Module 4
Hardware and Tools
The short shopping list and the eight tools on the bench. Where metal beats plastic, and where plastic is perfectly fine.
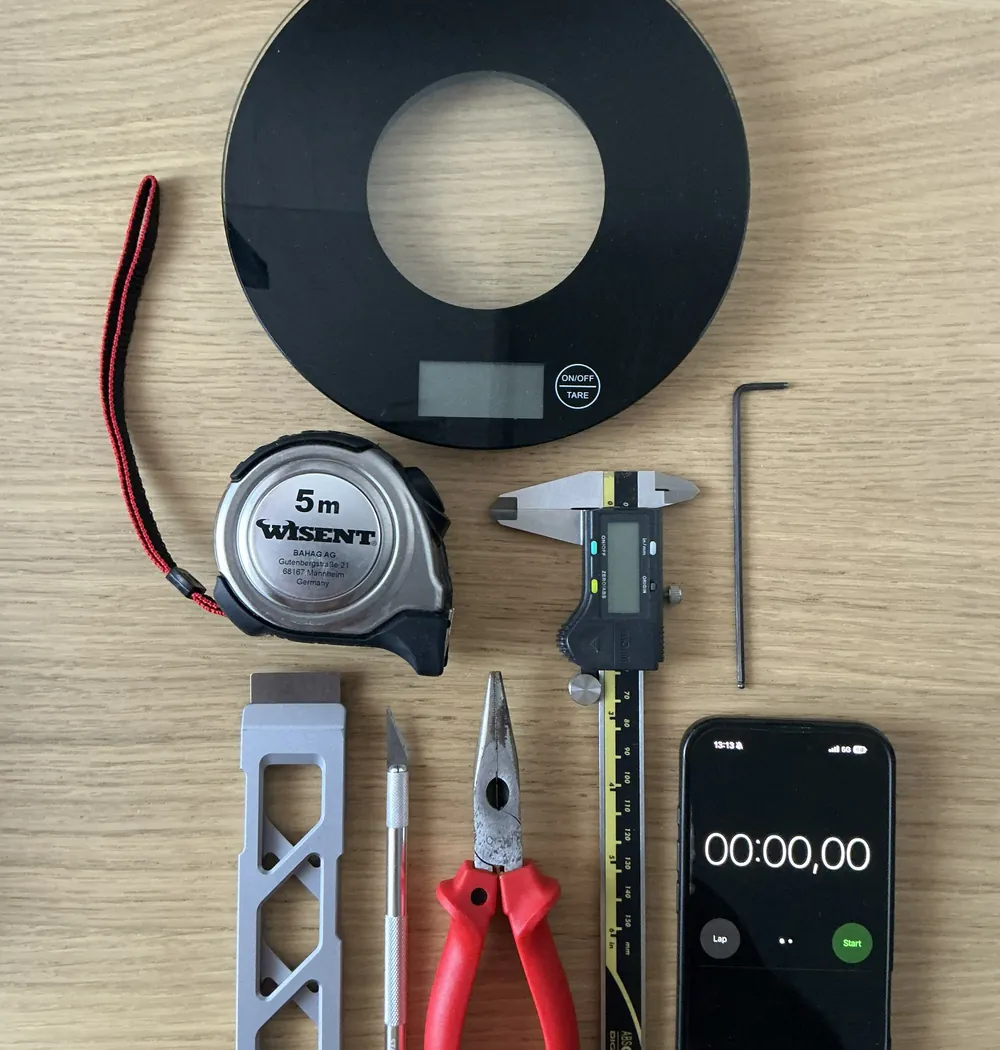
- •The complete non printed list: 9 ball bearings (4 x 12 x 4 mm), 20 washers, one 4 x 50 mm stainless steel shaft, 7 M4 screws, 16 lead inserts of 50 g each and 1.5 m of 1 mm cord. No springs, no motor, no electronics
- •Why the bearings are there: a printed bushing drags and wears, a ball bearing spins free. On a train with four gear stages, that difference decides whether the weight can drive the clock at all
- •Every tool used in the build: digital caliper, hex key, hobby knife, scraper, pliers, tape measure, kitchen scale, and the stopwatch on your phone. Nothing you need a workshop for
- •The printable shopping list with links comes as a bonus, so sourcing is one order, placed once
Module 5
Cleaning Up Parts Before Assembly
The printer is done. The parts are not a clock yet. The preparation that saves you hours of troubleshooting later.
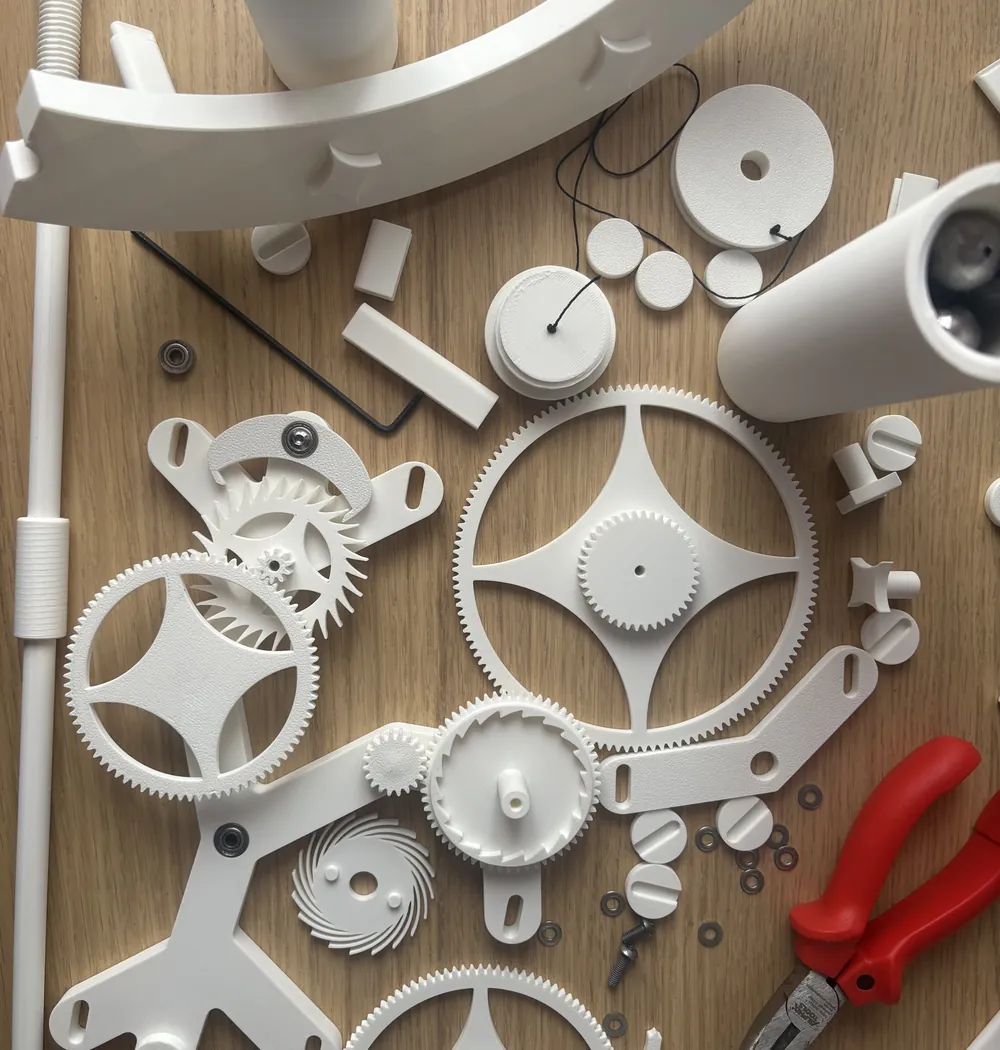
- •Which surfaces matter and which don't: bearing seats, shaft holes and gear teeth get inspected, everything else can keep its layer lines
- •Removing brims, strings and elephant foot without damaging a fit, with the hobby knife, the scraper and a steady hand
- •Measure before you press: how to check a bearing seat with the caliper, and what to do if your printer runs tight or loose
- •Sorting 84 parts into assembly order, matched to the reference sheets, so you never have to hunt for a gear halfway through a stage
Module 6
Assembly, Stage by Stage
From 84 parts to one mechanism, in the order that lets you test each stage before adding the next. The rule: don't continue until the previous stage spins freely.
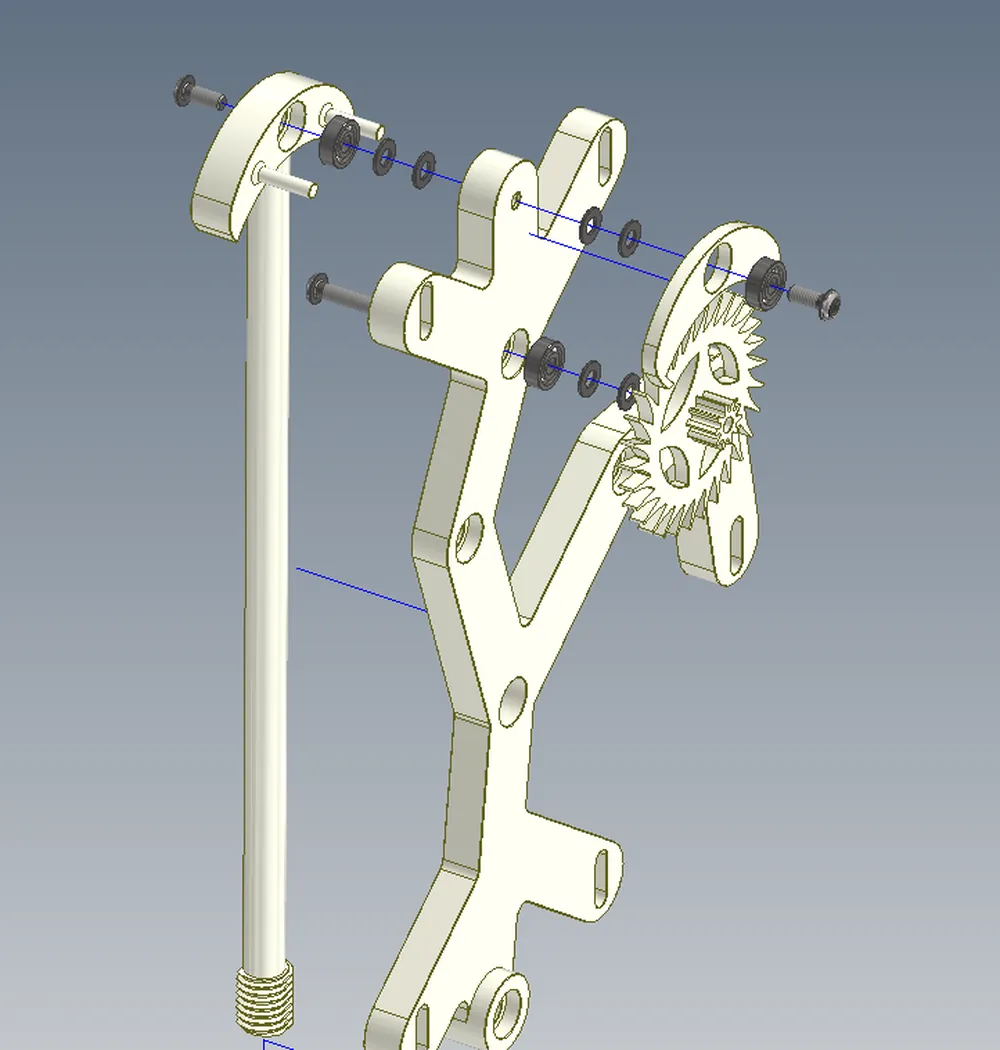
- •Frame first, then bearings, then the gear train one stage at a time, spinning each stage by hand before the next goes on
- •Washers and axial spacing, the small shims that stop gears tilting and rubbing on the frame
- •The drive: drum, driving gear, ratchet, cord and weight, and how to seat them so winding is smooth and the weight hangs true
- •Escape wheel, anchor and pendulum, set up from the exploded views, then the hands on the shared shaft, then the whole clock mounted on the pegboard
Module 7
First Start, Tuning and Troubleshooting
The moment the design has to prove itself. If it doesn't tick, you'll know exactly which stage to look at, and in what order.
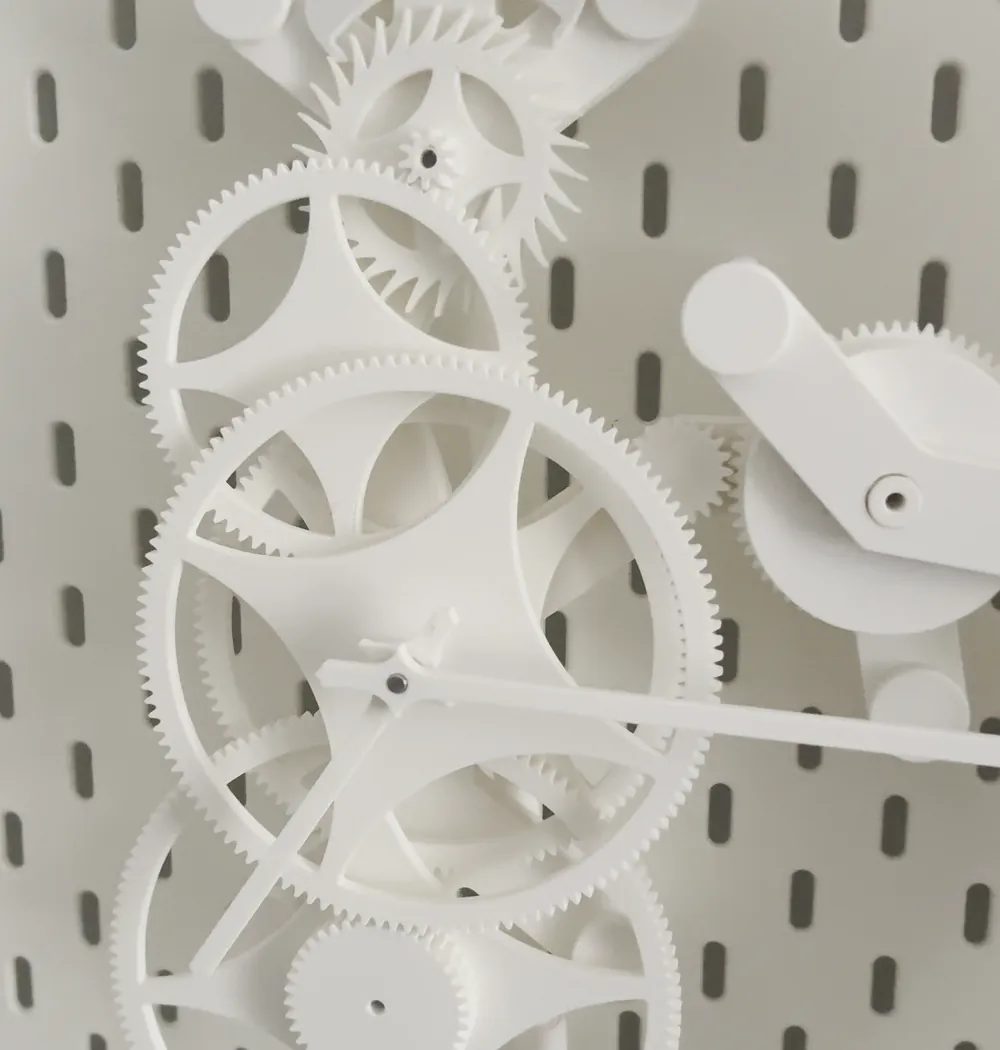
- •Hang the weight, nudge the pendulum, listen. What a healthy beat looks and sounds like, and what to check first if it stops
- •Finding the weight: the course clock settled at about 900 g, found by testing. How to work yours out with the kitchen scale instead of guessing
- •Pallet depth, binding and tilt: the systematic hunt, gear stage by gear stage, instead of swapping random parts and hoping
- •Regulating with the bob: up runs faster, down runs slower. Time the escape wheel against your phone stopwatch and walk it in
Module 8
Make It Yours
Cosmetic swaps that keep the mechanism working. Change the ring, hands, dial, spokes, pendulum and weight, and know exactly which lines you can't cross.
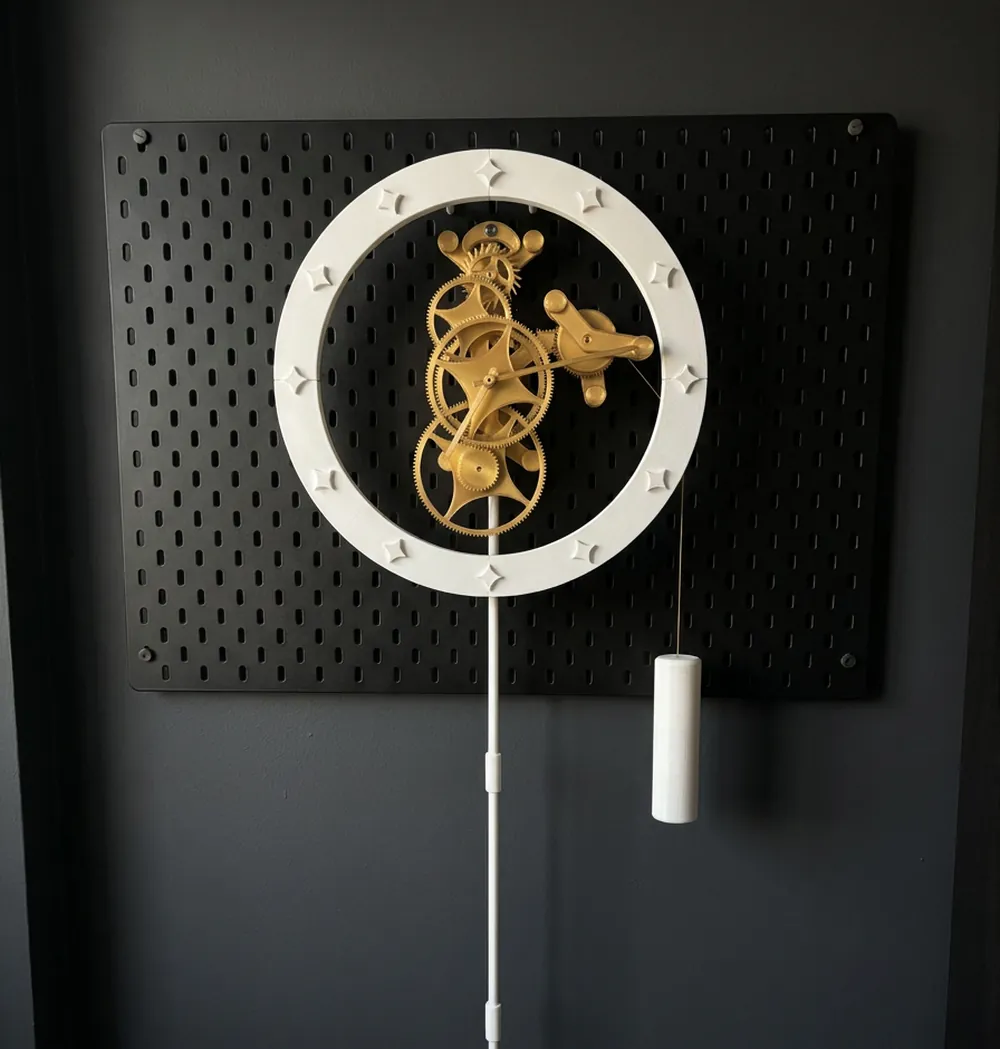
- •What's safe to change: ring, hands, dial, gear spokes, pendulum bob, weight shell, colors and filament, all without touching a single tooth or bearing
- •What isn't: gear ratios, axis positions and the escapement geometry. You'll know why, so you never find out the hard way
- •Mixed materials and two tone builds: wood fill rings, silk gears, a dark board behind white parts, and how to keep your tolerances when you switch filament
- •The STEP files are included alongside the STLs, so a cosmetic part can be opened and edited in whatever CAD you already use
You've seen what's inside. Eight modules. The complete print files for all 84 parts, and a build sequence that tests itself as you go.
The full price for this course is $149.
You're not going to pay that today. And the reason is simple.
This is the first time I've offered the files and the course to the public. I want 50 people to build it. I want to see your plates, read your questions, find out which fit runs tight on which printer, and where you get stuck.
That feedback is worth more to me right now than charging full price. Honestly, I also need to find out whether I can answer 50 inboxes' worth of questions about pallet depth and still sleep 😅
So for this first group, the price is dramatically lower. Once those 50 spots fill, this page comes down and the full price goes live.
Normally $149
Now Only $47
One-time payment.
Lifetime access.
90-Day Money-Back Guarantee
🔒 Secure Payment 🔒





P.S. If the next page doesn't load... I'm sorry, but the deal has ended!

Try it risk free
You don't have to make the final decision now.
Get the files and the full course. Slice the plates. Print the first one. Press the first bearing into its seat. Hang the weight, nudge the pendulum, and hear it tick for the first time.
If it isn't what you hoped, email hello@magicmechanisms.com within 90 days for a full refund. Within 24 hours of you sending the email. NO QUESTIONS ASKED. You risk nothing except owning a clock.
You Also Get These
Three bonus printables included with your access:
Bonus 1
$9 valueThe Hardware Shopping List
Every non printed part on one printable page, with links. Bearings, screws, washers, shaft, cord and lead inserts. Order the lot in one sitting.
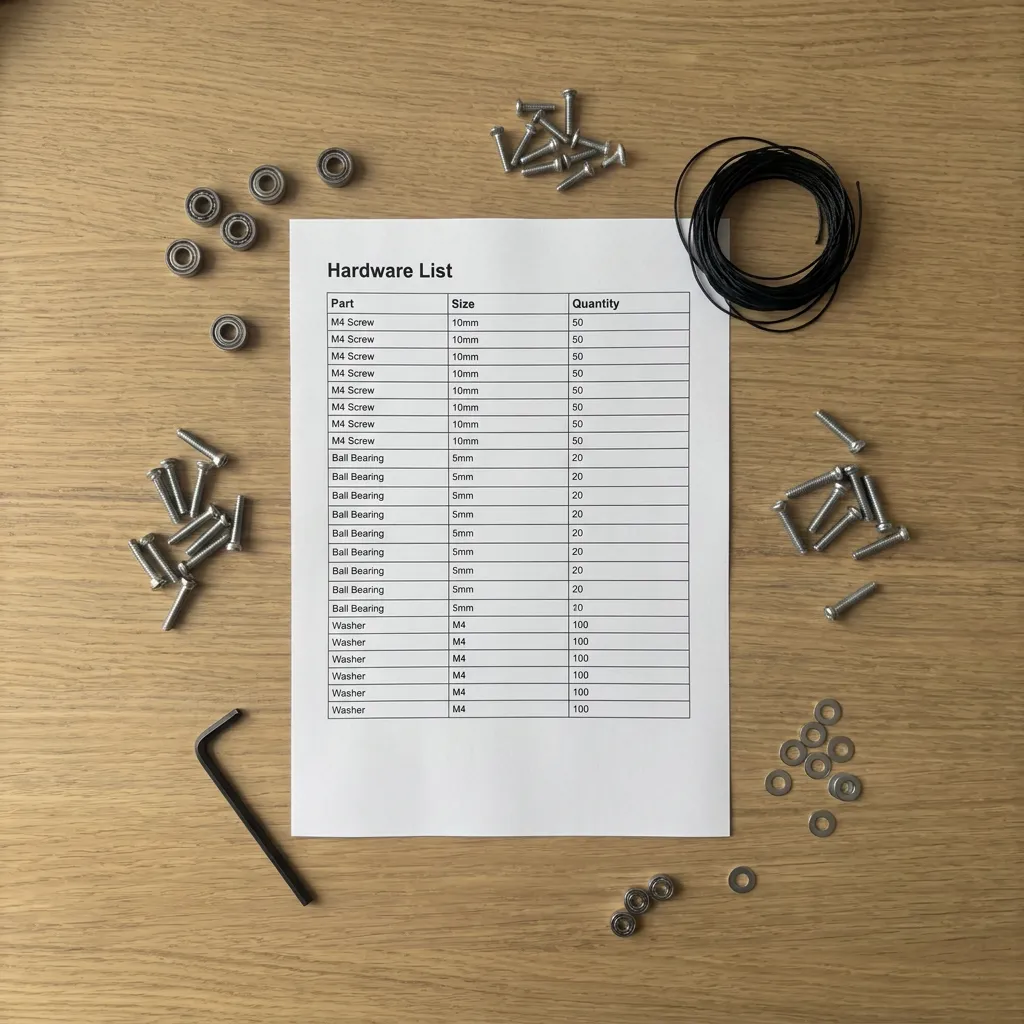
- •Exact sizes and quantities for every bearing, screw and washer, so nothing arrives one millimeter wrong
- •A link to buy each item, plus what to search for if the link is out of stock in your country
- •About $25 to $35 for the whole list, depending on your supplier and whether you buy single parts or packs
Bonus 2
$12 valueThe One Page Troubleshooting Checklist
Clock stopped? Start at the top and work down. Every symptom paired with its most likely cause and the fix.
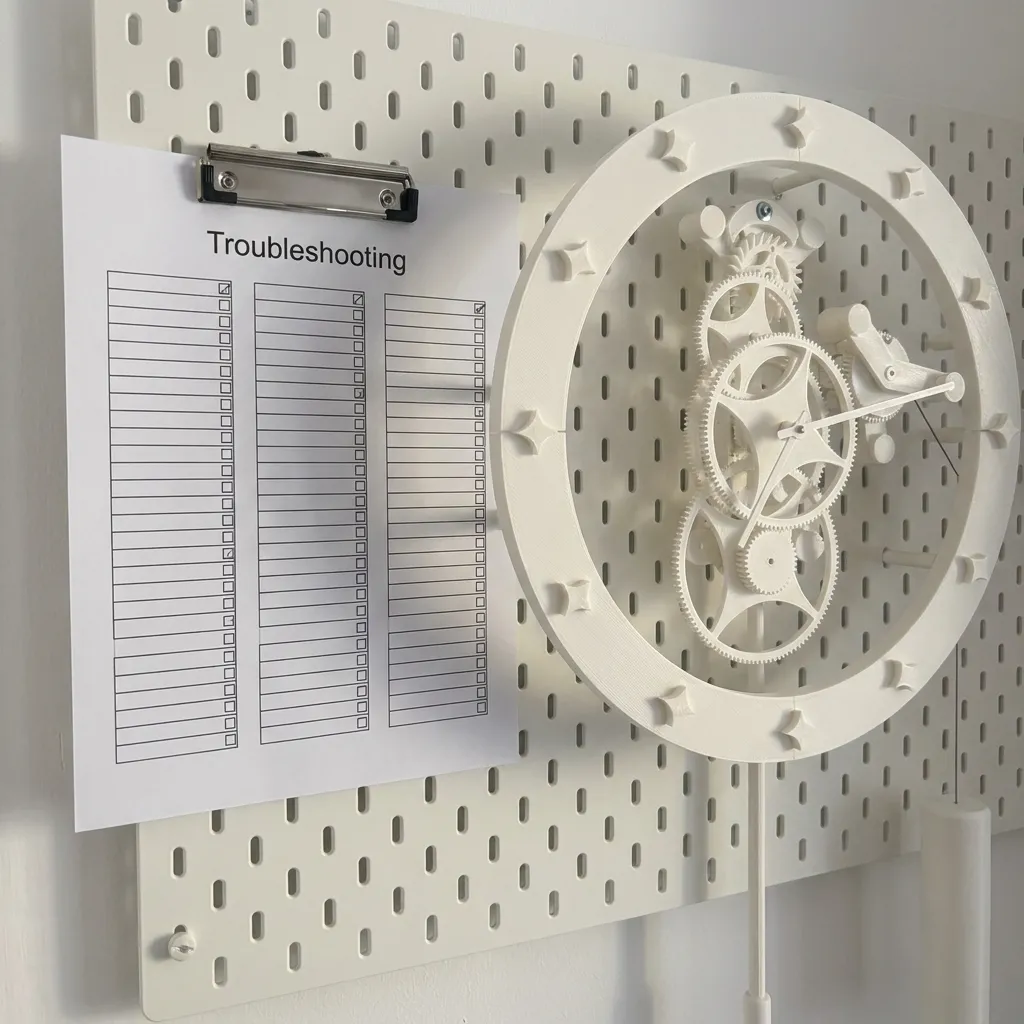
- •Symptom, cause, fix, in order of likelihood: won't start, runs then stops, runs fast, runs slow, hands slip, ratchet skips
- •The free spin test for each stage, so you isolate the problem to one shaft instead of taking the whole clock apart
- •Printable, so it hangs on the wall next to the clock. The machine and its manual side by side
Bonus 3
$19 valueThe Assembly Reference Sheets
Exploded views of every subassembly, printable, with part names and hardware called out. The sheets you keep on the bench while the video plays on the tablet.
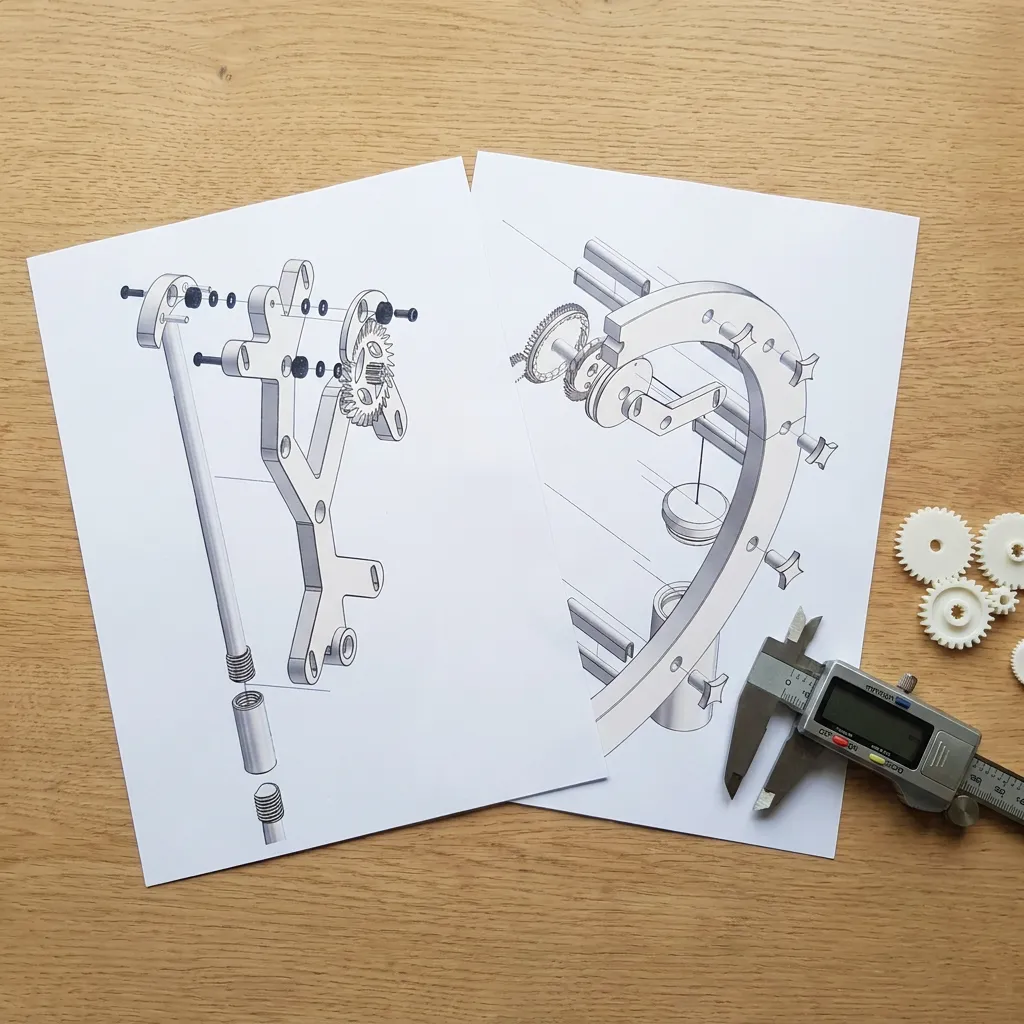
- •Every subassembly as an exploded view: frame, gear stages, drive, escapement, pendulum, hands, brackets
- •Each part labeled and matched to its build plate, so "which gear is this" is answered in two seconds
- •Hardware called out per step: which bearing, which screw, which washer goes where
Everything You Get Today
Normally $149
Now Only $47
One-time payment.
Lifetime access.
90-Day Money-Back Guarantee
🔒 Secure Payment 🔒
P.S. If the next page doesn't load... I'm sorry, but the deal has ended!
FAQ
Will it actually run?
Yes. The video at the top of this page is the real clock, running on the wall. It went through several versions before it ran reliably: bearing fits adjusted, gear positions refined, friction reduced, the drive section reinforced. You get the final version, plus the build order with a free spin test at every stage, which is the difference between a clock and a kinetic sculpture.
Do I need to be an engineer?
No. You need to run a printer, read a caliper and turn a hex key. Module 1 explains why the clock keeps time in plain language, and the assembly is ordered so you check each stage before the next one goes on. The engineering was done over several versions already. Your job is to build it, test as you go, and email me if something sticks.
My printer isn't a Bambu Lab X1 Carbon. Will the files work?
Yes, if it has a build volume of at least 256 x 256 x 256 mm. Every part fits inside that, and the largest ones, like the outer ring and the pendulum, are already split to fit. The ready project is for Bambu Studio, but you also get the STL and STEP files and the settings in writing for any slicer. On a smaller printer you would need to split the larger parts yourself in CAD, starting from the STEP files.
Where do I get the hardware, and what does it cost?
Bonus 1 is a printable shopping list with links: 9 ball bearings (4 x 12 x 4 mm), 20 washers, one 4 x 50 mm stainless steel shaft, 3 M4 x 10 and 4 M4 x 14 screws, 16 lead inserts of 50 g each and 1.5 m of 1 mm cord. Expect about $25 to $35 in total, depending on your supplier and whether you buy single parts or packs. Filament and the pegboard are extra.
Why pay when there are free clock models?
Because a free STL is a shape, and a clock is a set of fits, clearances and ratios that were tested on real parts. The free model gives you the geometry and leaves the engineering to you, which is why so many of them bind, stop, or never start. Here you get a design debugged across several printed versions, every print setting, the full assembly order with a test at each stage, and someone to email when it doesn't tick. If you'd rather spend the weekends working that out yourself, the free models are still there.
Isn't the all white design a bit plain?
The course clock is matte white because white parts on a white board show off the mechanism and nothing else. Module 8 covers everything cosmetic you can change (ring, hands, dial, spokes, pendulum, weight shell, colors, filament types). Gold gears on a black board or a terracotta ring are a filament change away, and none of it touches the mechanism.
How is it powered? Do I need a battery or a motor?
Neither. A weight of about 900 g hangs on a cord wound around a drum. As it falls it drives the gear train, the pendulum and escapement meter it out one tooth at a time, and you wind it back up by hand. By calculation, one winding runs the clock for about 6 hours, so expect to wind it a few times a day.
How accurate is it?
That depends on how far you take the tuning. After final adjustment, the course clock measured 9 minutes 58 seconds for 10 turns of the escape wheel, against an ideal 10 minutes. If that gap held all day it would come to about 5 minutes a day, though that is worked out from a short test and has not been measured over 24 hours. You can tune it closer by sliding the pendulum bob: up runs faster, down runs slower. Module 7 shows the whole procedure.
How much filament and print time does it take?
About 760 g of PLA Matte and about 24 hours of print time across 6 build plates, with a 0.4 mm nozzle and 0.2 mm layers. One 1 kg spool covers the whole clock with room to reprint a few parts.
How does it mount, and how big is it?
This version is built for an IKEA SKÅDIS pegboard and does not mount directly on a wall yet. The outer ring is 400 mm (about 16 in) across, and from the top of the ring to the end of the pendulum is about 1170 mm (about 46 in), so leave room below for the pendulum and for the weight to drop. Module 6 covers mounting.
How long is the course?
Eight modules of step by step video, from how the clock works to tuning the finished one, plus the files and three printable bonuses. Lifetime access, so you can print this month and build next month.
What's your refund policy?
90 day money back guarantee. No questions asked. Email hello@magicmechanisms.com and you'll get a full refund within 24 hours. You either love it or you pay nothing.
How is the content delivered?
Streaming video on any device (phone, tablet, computer). The print files (STL, STEP and the Bambu Studio project) and the three bonus sheets are downloads.
Is it safe to purchase online?
Yes. Payments are processed through Stripe, the same secure payment platform used by millions of businesses worldwide (including Amazon, Google, and Shopify). We never see your card details.
What happens after I purchase?
This is a founding presale. You'll receive a welcome email within minutes confirming your spot, and the files and lessons are released to the founding group within 2 to 3 weeks. You'll get an email the moment they go live.
Have a specific question?
Email us at hello@magicmechanisms.com and we'll get back to you as soon as possible.
Here's everything you get:
Normally $149
Now Only $47
One-time payment.
Lifetime access.
90-Day Money-Back Guarantee
🔒 Secure Payment 🔒
P.S. If the next page doesn't load... I'm sorry, but the deal has ended!